In the following tutorial we want to show you how to use a BlobMesh Object in 3ds Max which is controlled by a Particle System. We will also explain how to setup a basic mental ray studio and how we rendered the scene.
What we are going to create:
If you have any questions please feel free to contact us here.
Let`s get started:

Step 1: The scale is very important in this scene. So first go to Customize – Units Setup and set the Display Unit Scale to „Metric“. Click on „System Unit Setup“ and set the System Unit Scale to „1Unit = 1,0 Centimeters“.

Step 2: Create a PF Source and set the Icon Type to „Sphere“. Set the diameter to 1,0m and the Quantity Multiplier for the Viewport to 100%. This will display all of the particles in the viewport. Position the Icon at 0,0,0.

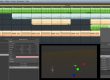
Step 3: Open Particle View (press 6). Set the Birth Emit Start and stop 0. Set the Amount to 50. This will emit all the 50 particles at frame 0.

Step 4: Delete the Speed and Rotation Operators. Set the Shape to „Sphere 80-sides“. Set the size to 0,2 and the Scale to 100,0% with 40% of Variation. In the Display Operator set the Type to „Geometry“ to display the particle shape in the viewport.

Step 5: Go to Create – Geometry – Compound Objects and create a BlobMesh object somewhere in the viewport.

Step 6: Go to the Modify Tab of the BlobMesh object and add the PF Source to it´s Blob Objects list. Set the Evaluation Coarseness for the Render to 1,0 and for the Viewport to 3,0.

Step 7: In Particle View set the Render Type of the PF Source to „None“. In the Display Operator set the Type also to „None“. We don´t want the particles to be rendered, just the BlobMesh Object.

Step 8: Create a Wind Force and position it at 0,0,0. Set it´s Strength to -0,1, it´s Turbulence to 1,0, the Frequency to 0,01 and the Scale of the Tubulence to 0,05. Set the type to „Spherical“.

Step 9: Create a Darg Force somewhere in the viewport. Set the Time Off to 100000 and the Linear Damping for the X, Y and Z Axis to 99,9 %. The Drag Force is a particle motion damper that reduces particle velocity within a specified range.

Step 10: Open Particle View (press 6). Drag in a Force Operator to the first Event. Add the Wind force to it´s Force Space Warp´s list and set the Influence to 100,0%.

Step 11: Still in Particle View add one more Force Operator to the first Event. Add the Drag Force to it´s Force Space Warp´s list and set the influence to 100,0%.

Step 12: The simulation is done now. Let´s setup a mental ray studio. In Left View create a Line as shown on the screenshot.

Step 13: Use the Fillet Tool to round up the corner. In the Interpolation Rollout set the Steps to 64 to smooth the curve.

Step 14: Apply an Extrude Modifier to the Line. Set the Amount to 20,0m and apply a Shell Modifier. Position the backplate as shown on the screenshot.

Step 15: In Left View create a Photometric Free Light. 3ds Max will ask you to change the Exposure Control to „mr Photographic Exposure Control“. Click „yes“ and click into the viewport to create the Free Light.

Step 16: Go to the Modify Panel of the light and turn on Shadows. Change them to „Ray Traced Shadows“ and set the Light Distribution (Type) to „Uniform Diffuse“. Change the Light Shape to „Rectangle“. Set the Length and Width to 3,0m and change the Resulting Intensity to 50,0%. Position the light as shown in the screenshot.

Step 17: Go to the Material Editor (press M) and apply an Arch & Design Material to the first slot. Change the Diffuse Color to almost white and apply the material to the backplate.

Step 18: Apply a Subsurface Scattering Fast Skin Material to the second slot. Change the number of samples to 128 to increase the quality. Set the colors as shown on the screenshot.

Step 19: Change the Overall specular Weight to 0,3 and the Scale conversion factor to 0,04. Apply the material to the Blobmesh Object.

Step 20: Create a camera and set the Lens to 20,0mm. Enable the „Depth of Field (mantal ray) Multi-Pass Effect and set the f-stop to 0,25.

Step 21: Render the scene. For better quality increase the number of samples in the Subsurface Scattering material and increase the Shadow Samples of the Photometric Light. In Render Setup increase the Samples per Pixel to Minimum 4 and Maximum 16. Change the Filter Type to „Mitchell“. In Final Gather Rollout set the Ray per FG Point to 150 and the Interpolate Over Num. FG Points to 50.
If you have any questions please feel free to comment the blog or contact us here.